1 Google Authenticator简介
Google身份验证器是一款基于时间与哈希的一次性密码算法的两步验证软件令牌,此软件用于Google的认证服务。此项服务所使用的算法已列于RFC 6238和RFC 4226中。
Google身份验证器给予用户一个六位到八位的一次性密码用于进行登录Google或其他站点时的附加验证。其同样可以给第三方应用生成口令,例如密码管家程序或网络硬盘。先前版本的Google身份验证器开放源代码,但之后的版本以专有软件的形式公开。
2 搭建ssh+google authenticator认证
通常我们直接通过ssh输入密码连接服务器,但这样很容易出现暴力破解情况,所以我们可以结合google的动态认证+ssh密码,这样能够大大的提升登陆的安全。
2.1 环境说明
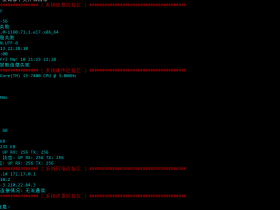
[root@node01 ~]# cat /etc/redhat-release
CentOS Linux release 7.7.1908 (Core)
[root@node01 ~]# uname -a
Linux node01 3.10.0-229.el7.x86_64 #1 SMP Fri Mar 6 11:36:42 UTC 2015 x86_64 x86_64 x86_64 GNU/Linux
[root@node01 ~]# sestatus
SELinux status:                 disabled
2.2 安装依赖包
yum -y install gcc make pam-devel libpng-devel libtool wget git
2.3 安装谷歌身份验证器
wget https://github.com/google/google-authenticator-libpam/archive/1.04.tar.gz
tar xf 1.02.tar.gz
cd google-authenticator-1.02/libpam/
./bootstrap.sh
./configure
make && make install

cp /usr/local/lib/security/pam_google_authenticator.so /lib64/security/
3 配置SSH+Google Authenticator
3.1 初始配置 Google Authenticator
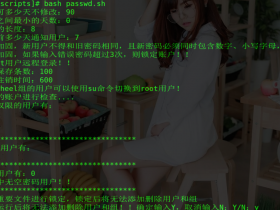
[root@node01 ~]# google-authenticator

Do you want authentication tokens to be time-based (y/n) y ## 是否基于时间的认证,这里选择y
https://www.google.com/chart?chs=200x200&chld=M|0&cht=qr&chl=otpauth://totp/root@node01%3Fsecret%3DE3DJDDKAW2XHF65ID3OZEVQ5VU%26issuer%3Dnode01
这里会产生一个二维码
Your new secret key is: E3DJDDKAW2XHF65ID3OZEVQ5VU
Your verification code is 069649
Your emergency scratch codes are:
  76541760
  11129253
  24942085
  38027663
  61576093
# 这5个码用于在取不到或错的验证码有错时,用于应急用的。不过每个只能用一次,不能重复使用。
Do you want me to update your "/root/.google_authenticator" file? (y/n) y
#是否更新用户的 Google Authenticator 配置文件,选择 y 才能使上面操作对当前用户生效,其实就是在对应用户的 Home 目录下生成了一个 .google_authenticator 文件,如果你想停用这个用户的 Google Authenticator 验证,只需要删除这个用户 Home 目录下的 .google_authenticator 文件就可以了。
Do you want to disallow multiple uses of the same authentication
token? This restricts you to one login about every 30s, but it increases
your chances to notice or even prevent man-in-the-middle attacks (y/n) y
# 每次生成的认证码是否同时只允许一个人使用?这里选择 y。

By default, tokens are good for 30 seconds. In order to compensate for
possible time-skew between the client and the server, we allow an extra
token before and after the current time. If you experience problems with
poor time synchronization, you can increase the window from its default
size of +-1min (window size of 3) to about +-4min (window size of
17 acceptable tokens).
Do you want to do so? (y/n) y
每次生成的令牌30s生成一次,最高允许存在误差4分钟。

If the computer that you are logging into isn't hardened against brute-force
login attempts, you can enable rate-limiting for the authentication module.
By default, this limits attackers to no more than 3 login attempts every 30s.
Do you want to enable rate-limiting (y/n) y
#是否启用次数限制?这里选择 y,默认每 30 秒最多尝试登录 3 次。

查看生成的文件
[root@node01 ~]# ll /root/.google_authenticator
-r-------- 1 root root 136 Feb 27 18:30 /root/.google_authenticator
3.2 SSH调用及客户端配置
添加pam认证,在第一行添加
vim  /etc/pam.d/sshd
#%PAM-1.0
auth       required     pam_google_authenticator.so
auth       required pam_sepermit.so
auth       substack     password-auth
auth       include      postlogin
# Used with polkit to reauthorize users in remote sessions
-auth      optional     pam_reauthorize.so prepare
account    required     pam_nologin.so
account    include      password-auth
password   include      password-auth
# pam_selinux.so close should be the first session rule
session    required     pam_selinux.so close
session    required     pam_loginuid.so
# pam_selinux.so open should only be followed by sessions to be executed in the user context
session    required     pam_selinux.so open env_params
session    required     pam_namespace.so
session    optional     pam_keyinit.so force revoke
session    include      password-auth
session    include      postlogin
# Used with polkit to reauthorize users in remote sessions
-session   optional     pam_reauthorize.so prepare

修改sshd配置
vim /etc/ssh/sshd_config
ChallengeResponseAuthentication yes
#ChallengeResponseAuthentication no

重启sshd服务
systemctl restart sshd
4 客户端密码生成器使用
Android客户端
下载地址:https://play.google.com/store/apps/details?id=com.google.android.apps.authenticator2&hl=zh
CLSN镜像地址 https://clsn.io/files/google/com.google.android.apps.authenticator.apk
或者下载身份宝也可以
http://otp.aliyun.com/shenfenbao.html
如果手机是ios,就去apple store里搜索"Google Authenticator"
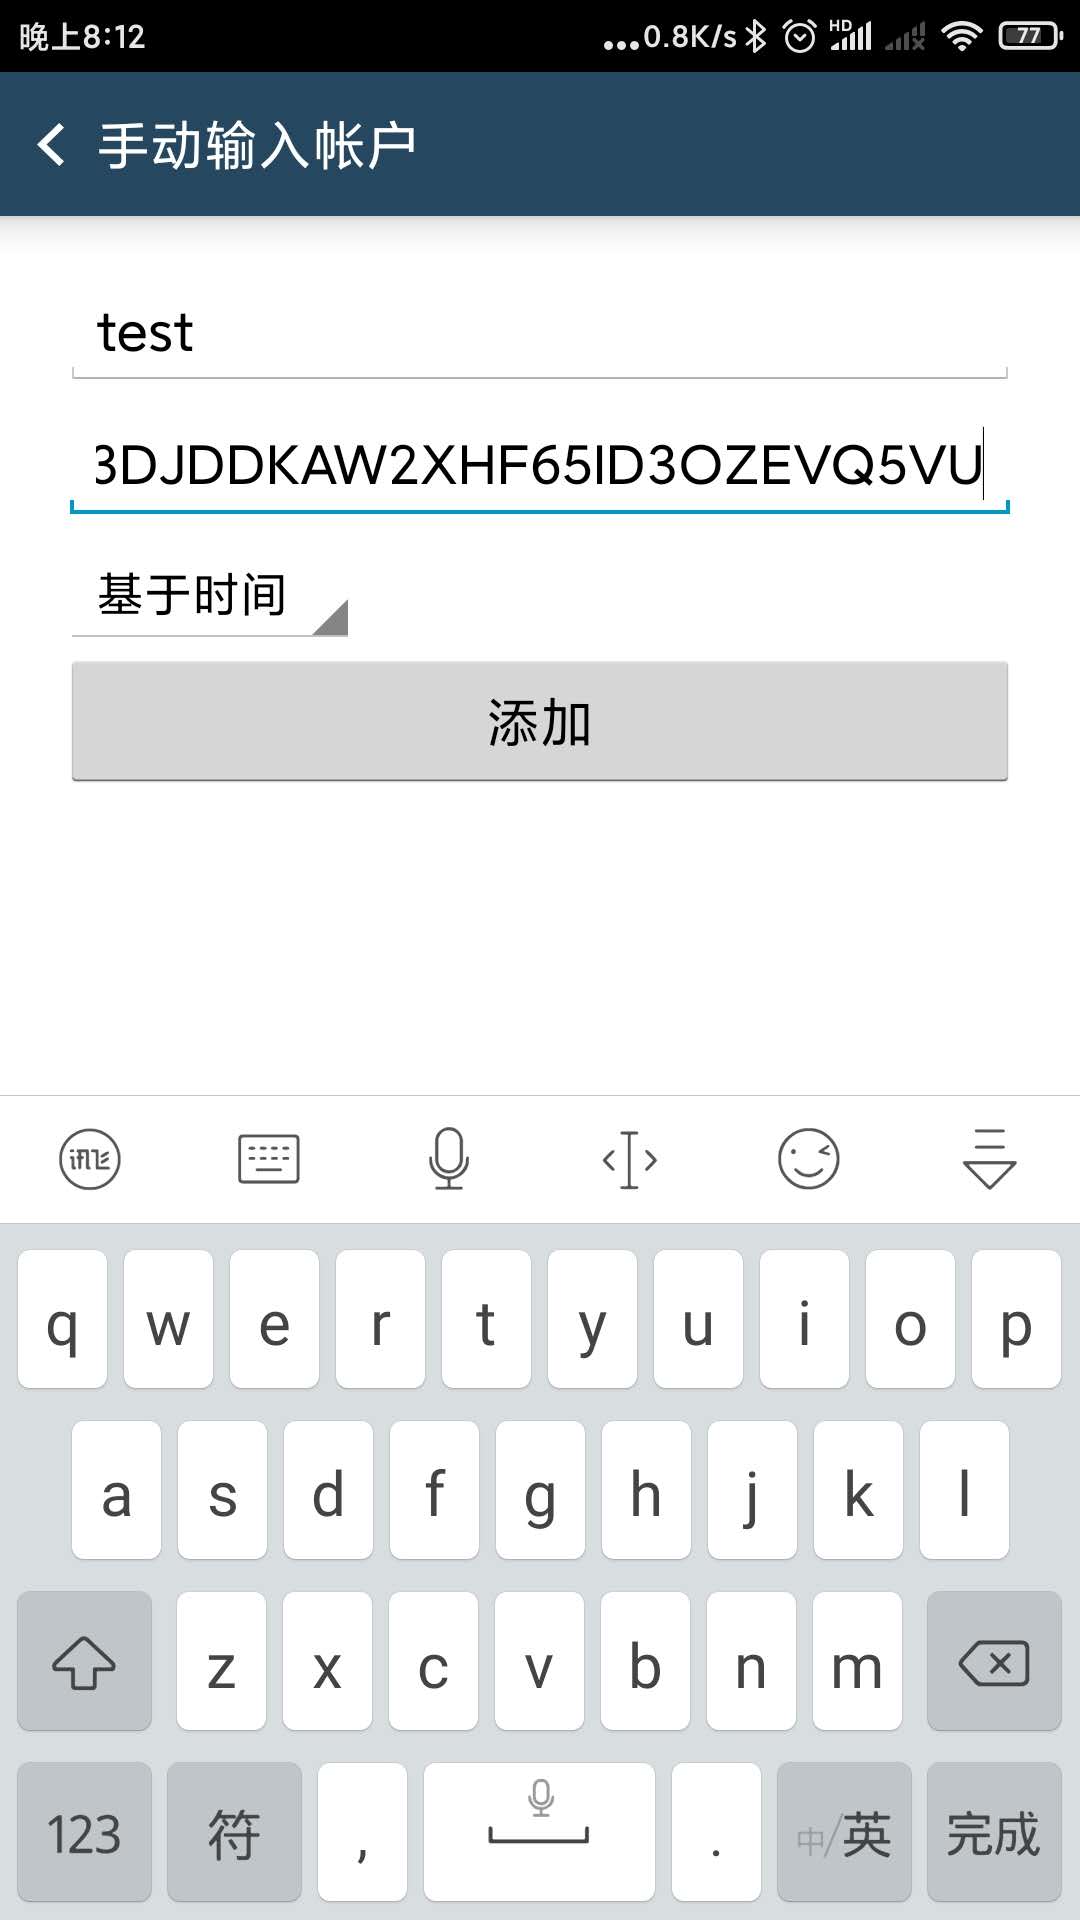
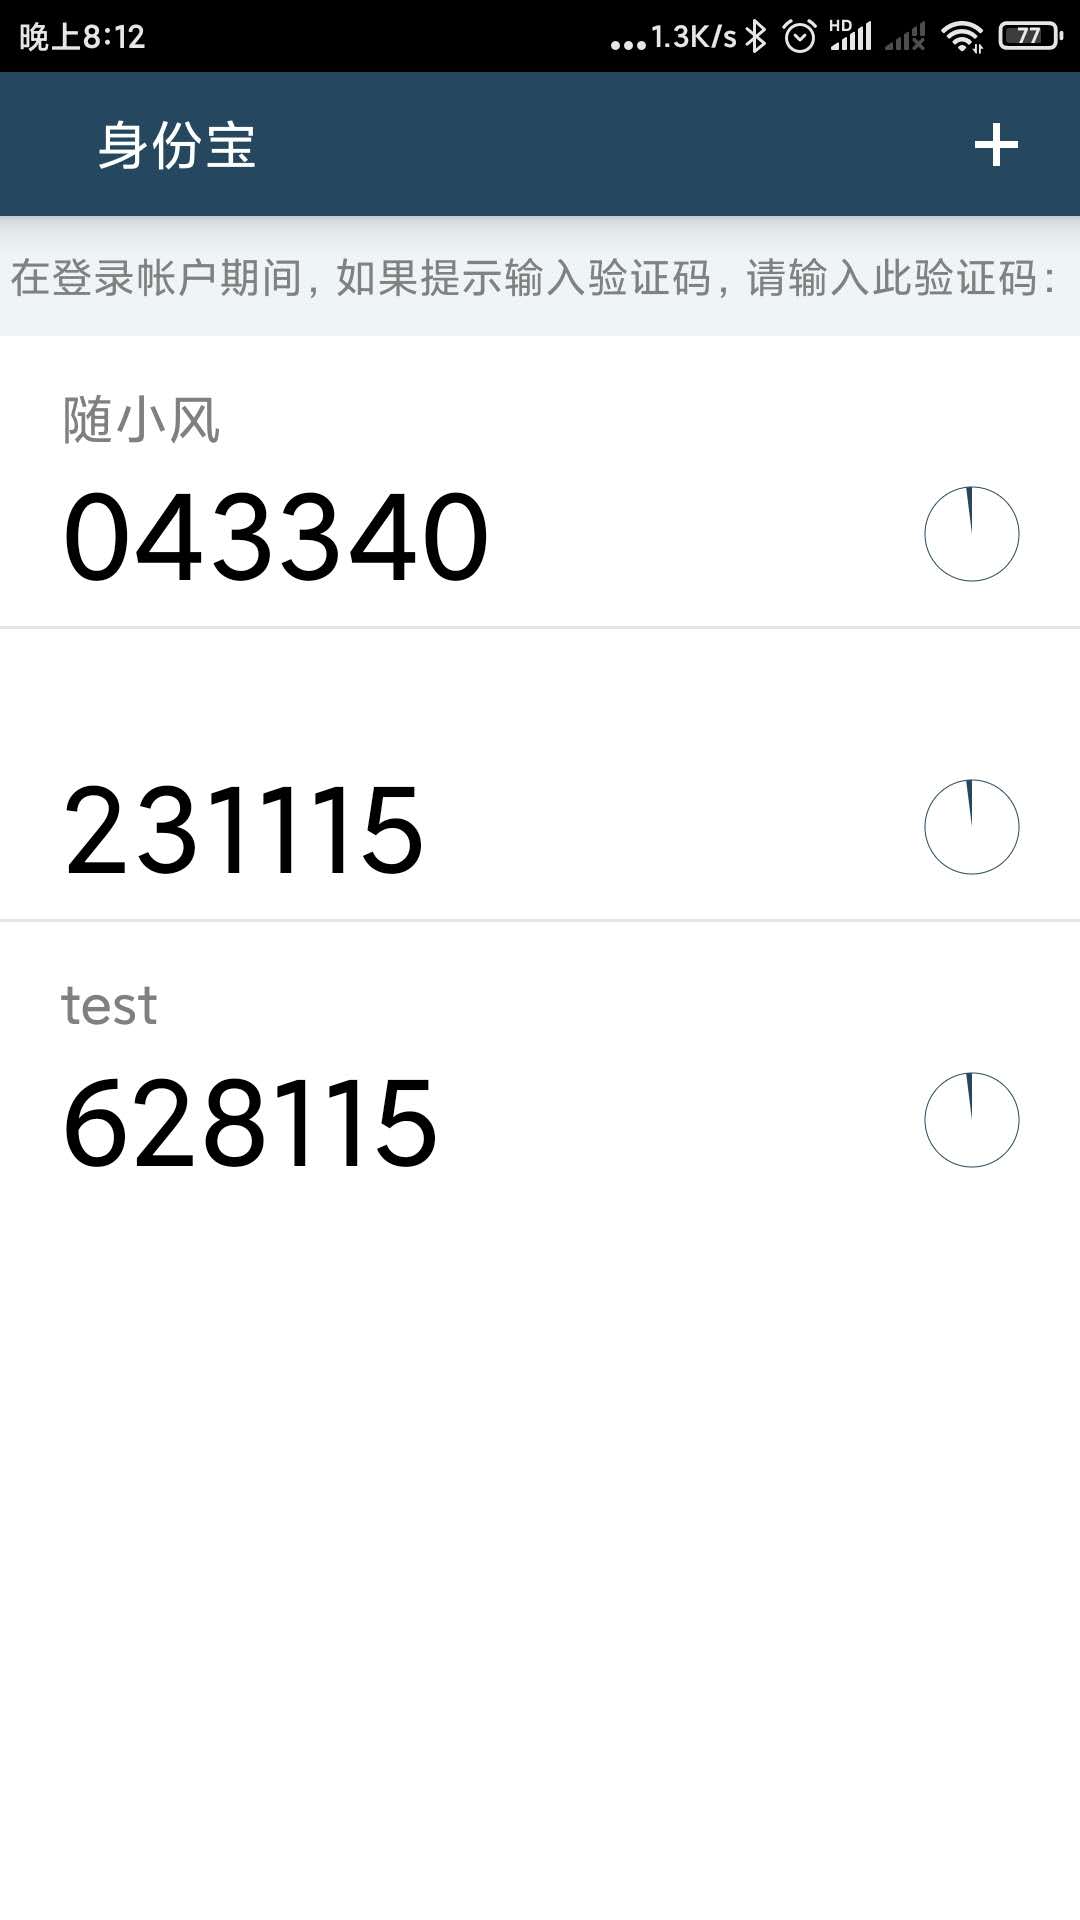
安装完后,打开App,点击“开始设置”,选择“扫描条形码”扫描上面 google-authenticator 命令生成的二维码,或者是选择“输入密钥(E3DJDDKAW2XHF65ID3OZEVQ5VU)”,然后手机上就能看到对应的六位数认证码了。
操作如图
5 验证登陆